This is an Eval Central archive copy, find the original at depictdatastudio.com.
Ready for an advanced presentation technique?
Want to make sure your audience is engaged?
No, those 10-minute Q&As at the end of a presentation don’t count as adequate engagement. Let’s notch up our engagement!
In this blog post, you’ll learn about the “Choose Your Own Adventure” method for engaging our audiences during presentations.
In March 2021, I was speaking at the Nonprofit Technology Network’s conference, 21NTC, and I used this technique.
I started to write a blog post with screenshots, but I really want to show you how this works.
In this video, you’ll see:
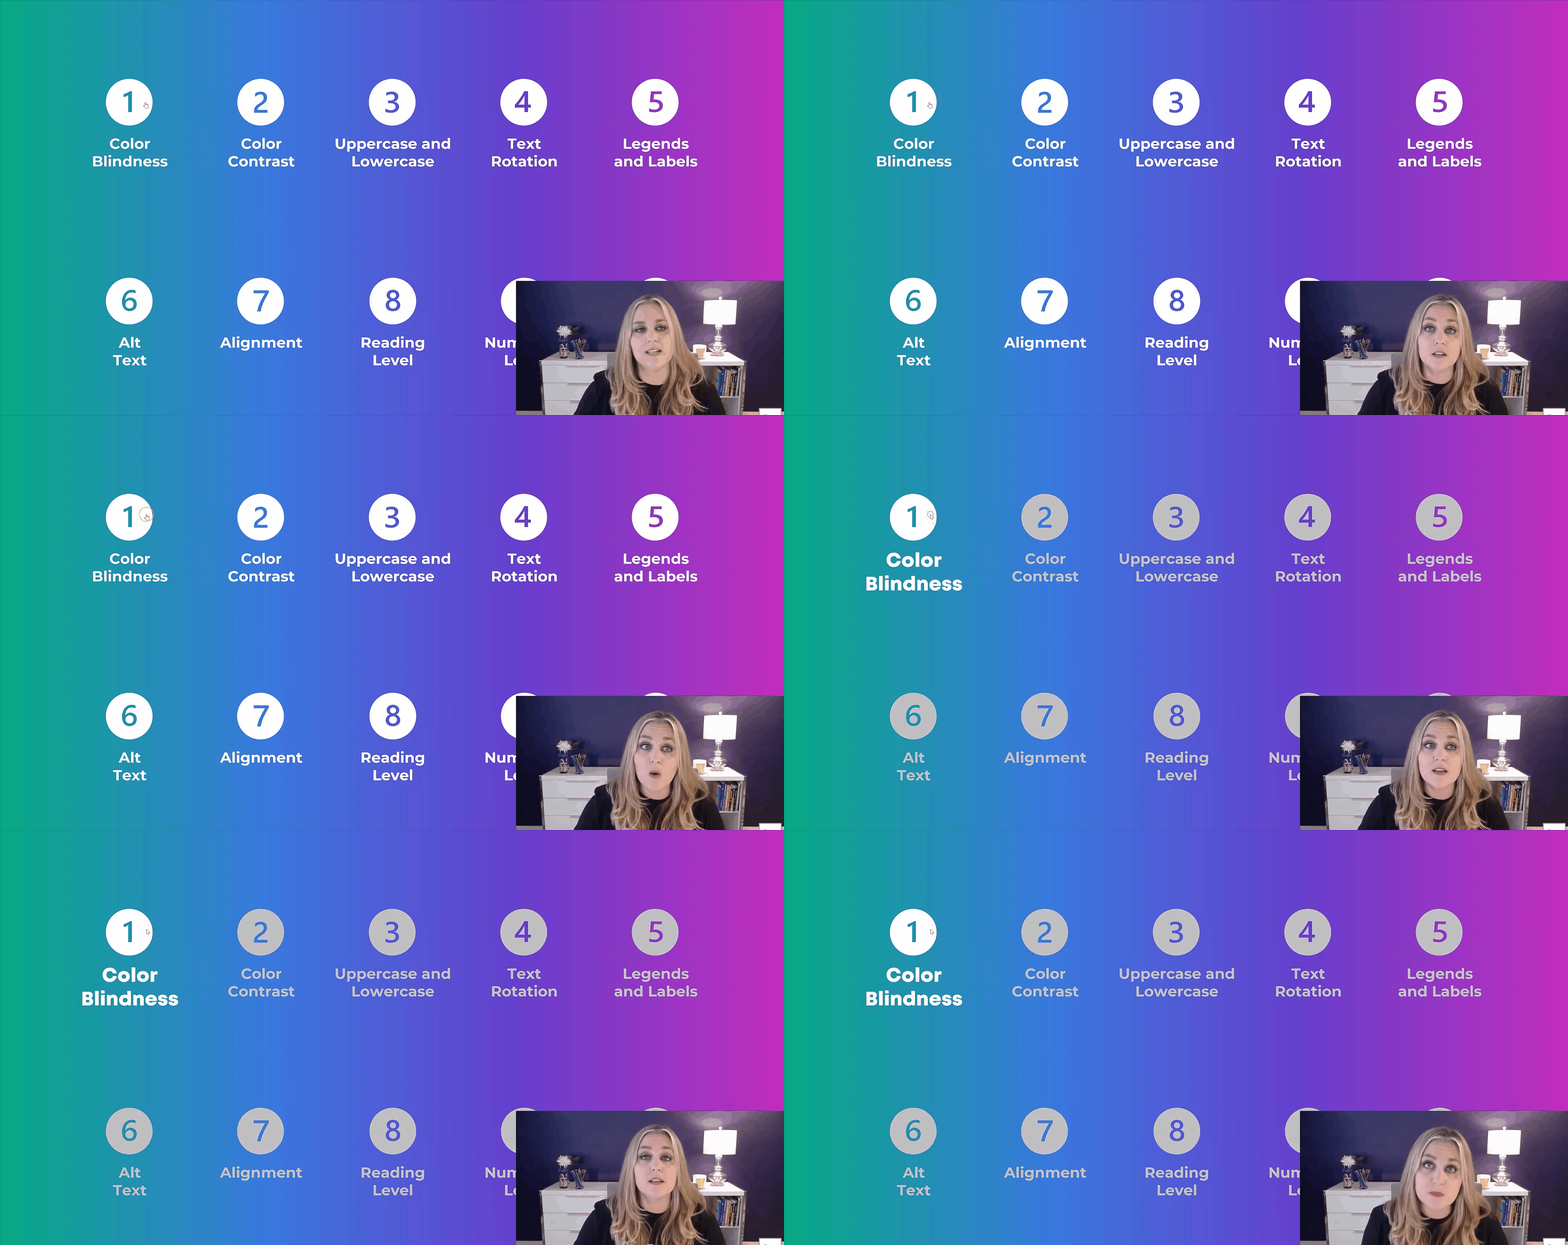
- A brief demo of the Choose Your Own Adventure method
- A behind-the-scenes tour of my slides
- A discussion of the caveats so you can decide when to use this method
Watch the Video
The Choose Your Own Adventure Method
As you saw in the video, the Choose Your Own Adventure technique puts our audience in the driver’s seat.
Here’s what the presentation looks and feels like for our audience members.
Step 1: Show the Table of Contents Slide
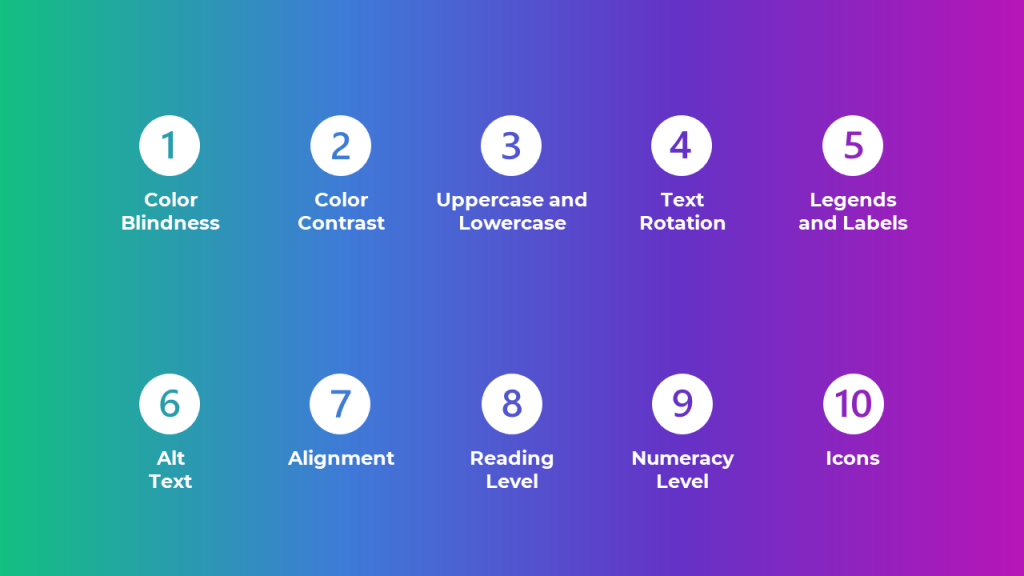
First, we show them a Table of Contents slide, which has an overview of all the topics we might cover.

I tell the audience that there’s tons to learn about this topic, but we’ll only have time to cover a few techniques during our short time together.
My 21NTC presentation was 60 minutes long, so we had time for 3 techniques.
Step 2: Ask Attendees to Vote for their Preferred Topics
Then, the audience members vote and help us prioritize which topic(s) we’ll cover.
For example, in my 21NTC presentation in March, I simply asked the attendees to type their votes into the chat window.
You’ll need to make some small talk while audience members are typing in their votes.
Sometimes, there might be a 15- to 30-second delay between us and the audience members. I’ve given virtual talks on a bunch of different conference platforms (Whova, etc.), and most of them have a slight delay. We’ll need to factor that in, too. More small talk.
In the video, you’ll see what I did for my 21NTC presentation. While the audience members were voting, I simply let them know that they could download an ebook to learn all 10 techniques.
Step 3: Click on their Preferred Topics on the Table of Contents Slide
Finally, the links propel us to the correct place in the presentation.
If attendees want to learn about Color Blindness, for instance, then I would click on the Color Blindness section of this slide. The links fast-forward us to that segment of slides.
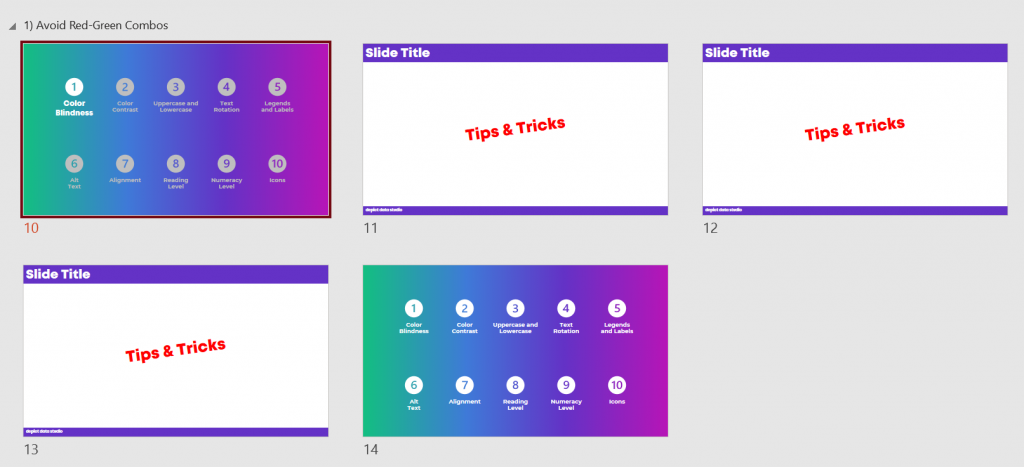
For example, our Table of Contents slide might be on slide 5, and we can use the links to fast-forward to slide 50.

Step 4: Discuss that Topic & Show the Table of Contents Slide Again
At the end of the Color Blindness section, we see the Table of Contents slide again.
The presenter clicks on the second topic that the audience members wanted to talk about, and the links propel us to that segment of the presentation.
And on and on.

I often conclude with a case study. We’ll discuss the case studies and their links in a moment.
A Behind-the-Scenes Tour of My PowerPoint Slides
In the video, you’ll see exactly which buttons to click on to create a Choose Your Own Adventure presentation.
Links on the Table of Contents Slide
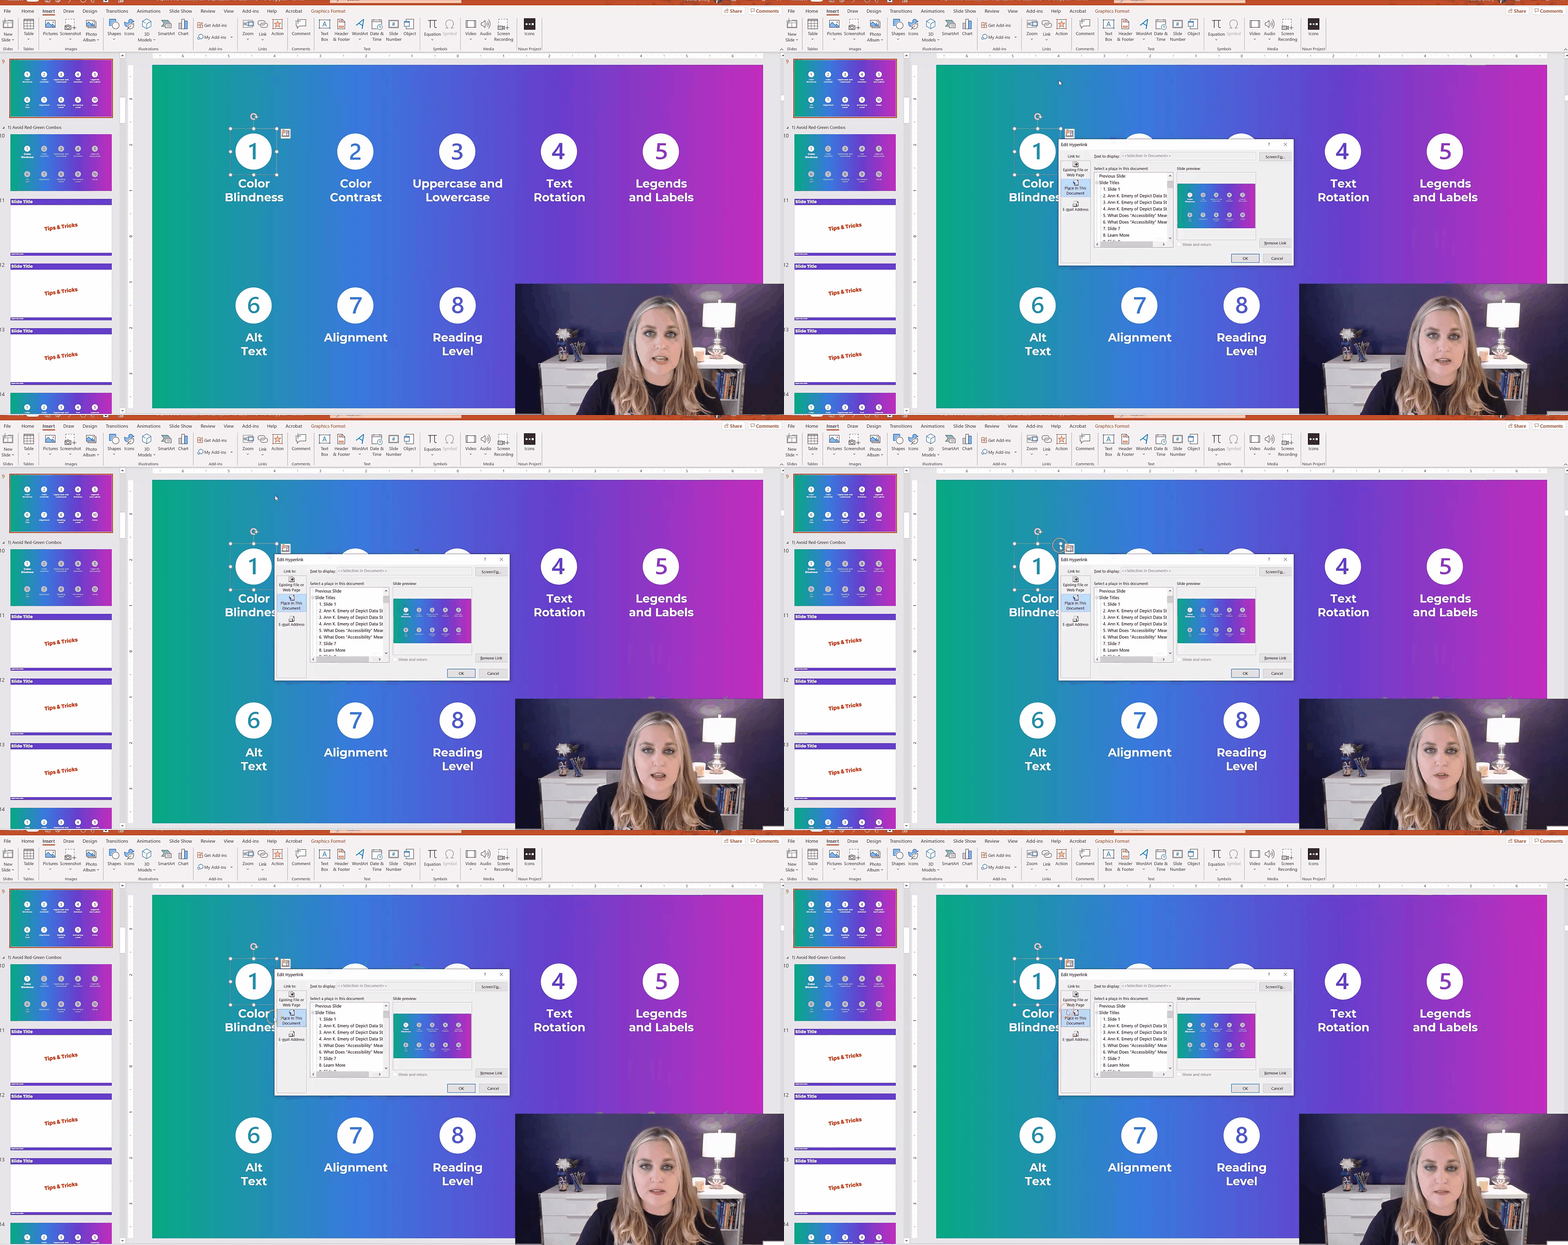
Here’s how you can add links to your PowerPoint slides:
- Click on the icon or text box where you want to create a link.
- Go to the Insert tab at the top of the screen.
- Go to the Link button.
- Click the down-arrow.
- Insert a link.
- In the pop-up window, choose Place in this Document.
- You can scroll through your list of numbered slides and choose one.
- Click ok.
That’s it!
When you click the icon or text box during your live presentation, the links will take you and your audience to the appropriate segment of your presentation.

Invisible Links to the Case Studies
Sometimes I end my presentations with case studies. These case studies give the attendees a chance to put their new knowledge into use.
For example, at the 21NTC conference, I prepared three case studies in advance. I had a beginner, intermediate, and advanced case study. I knew we’d only have time to cover one of the case studies.
As shown in the video, I simply added links to the case studies to the Table of Contents slide.
There are invisible rectangles on my Table of Contents slide. The top rectangle is a link to the beginner case study, the middle rectangle is a link to the intermediate case study, and the bottom rectangle is a link to the advanced case study.
Caveats
Wondering whether this technique is right for you?
Should you continue giving a “regular” linear presentation? Or should you try a “Choose Your Own Adventure” non-linear presentation??
Here are two factors to consider:
- This is an advanced technique. You need to be an expert in your topic area and have tons of presentation experience. You have to be nimble enough to speak about any of your topics in any order, and to adjust the time spent on each topic on the fly.
- This technique only works when the topics can be presented in any order . In my accessibility presentation, I could discuss topic 1, 2, and 3. Or, I could discuss 1, 3, and 2. The techniques aren’t sequential; they can truly be taught in any order. Make sure your topics can be delivered in any order, too.
Your Turn
After you try this, get in touch! Share tips of your own so we can learn from each other.