This is an Eval Central archive copy, find the original at freshspectrum.com.
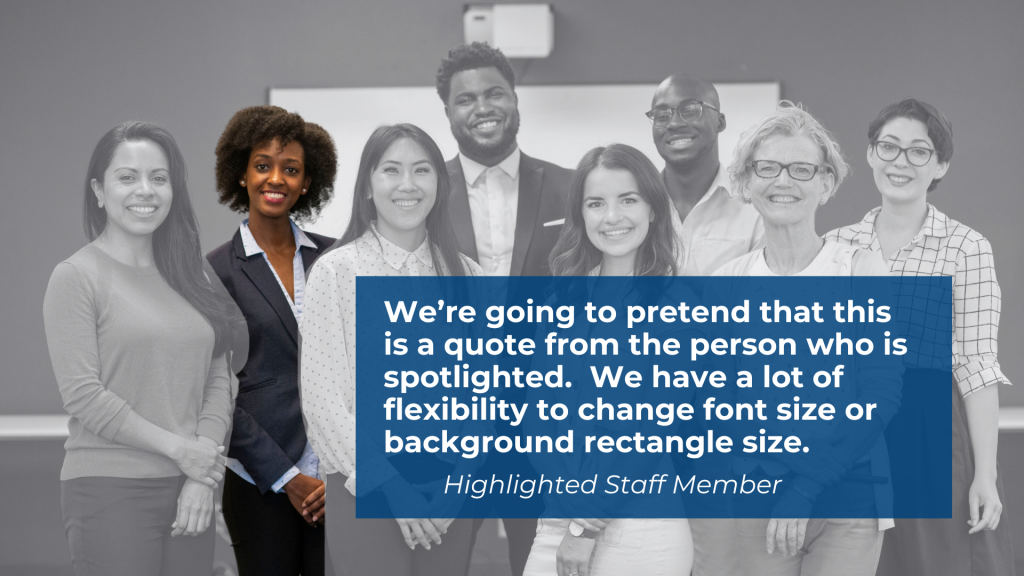
In this video I’ll show you step by step how to create a simple spotlight graphic. This can be a really easy way to illustrate interviews in qualitative reports. This particular graphic was created using Canva.
This is part of the DiY Data Design recipes series.
Full Transcript
Hey data designer!
If you ever write reports with qualitative data, you probably end up with this challenge. Qualitative data can be overwhelmingly text heavy.
To make these reports easier to read, you need to do two things. The first is just to follow the rules of good graphic design. The second is to find appropriate ways to add pictures to your reports.
Today’s recipe is on a simple method you can use to spotlight an individual inside of a
team photo. This can be a really easy way to illustrate interviews with individual group members. You
just need a group photo of some type. You just repeat the following steps for each person you want to spotlight.
To start we’re going to open Canva and create a standard blank 16 by 9 presentation. Since this is just a tutorial, I’m going to start with a random team photo inside of Canva’s
stock image library.
One step I usually take when editing photos or creating infographics is to make duplicates
of the page anytime I want back up copy.
When you click on a photo inside of a canva design you get an image effects menu.
For this recipe I’m going to use Canva’s background remover.
Just a note, this is a Canva pro feature, which I have. There are also other photo
background removers on the web that are free, including Adobe Express (just google it).
While it’s never perfect, I’m always pretty impressed by the job of the Canva background
remover. This used to be a bit of an annoying process, now it’s just a button click.
Let’s go away from the background removed image and make another copy of the first
team photo image. This time we’ll click on the photo and use one of the Canva black and white photo filters.
After that, what I do is actually copy and paste the background removed image overtop of
the black and white image. Then I’ll reduce the size of that image so it spotlights a specific individual.
At this point, if you’re not picky, this might be enough for you. But let’s take it a step
further. After you do a background removal, you can click on the button again to pull up a
configuration window.
From here, we can actually manually erase parts of the photo.
So that’s what I did. I manually erased space around the person I want to spotlight.
You don’t have to erase the whole rest of the photo, because you can also crop things out.
You just want to get rid of the elements right around the person you want to spotlight.
There, now I have one person spotlighted.
She didn’t stand out enough for me. So I clicked on the background black and white
picture and turned down the transparency.
This will help the spotlight pop a bit more.
Now that I have a person spotlighted, let’s add a space for a quote.
You can find rectangles in the elements menu by looking for shapes.
Or you can use a shortcut and just click the R button.
Sometimes with a photo background I’ll also add a little transparency to the background
box to pull the image through. This is all just preference.
Next I’ll add some text using the shortcut t in canva, or by clicking in the text menu.
There are a lot of ways to edit text. With the text selected you can find different options in the menu at the top of the page. There are also text effects if you want to test some of those out.
After I put in the text, the background picture was coming through a little too much, so I
brought the transparency back up just a little.
Then it’s all about tweaking until I am pretty happy with the image.
After I’m done, I want to go ahead and download the image. Most of the time, I’ll download
the image as a PNG.
One thing to note, is that because I kept making duplicate copies of the page I was working
on, I ended up with a multi-page document. Instead of deleting all my backups I usually just use the select pages option in the menu to select the current page.
And that’s it. Here is our final visual.

The good thing about this technique, is that if you only have one picture that includes
multiple people, you can use that same picture over and over again. Because each time it will have a different person spotlighted, it won’t feel monotonous and will help your reader stay connected to each person being interviewed.
If you enjoyed this video, please go ahead and like, subscribe, and leave a comment. It
means a lot and I will always read every comment. And if you’re interested in free resources like eBooks and courses, visit my resource library at freshspectrum.com/library
Now… Get out of your head and go create some stuff.